Nope just sticky as all get out.
I have used High tack on several of these and had zero issues.
The anerobic stuff is spendy and most of us dont have a can lying around.
Just gotta use the High tac sparingly is all


 Missy Good Wench ( Moderator)
Nope just sticky as all get out.
I have used High tack on several of these and had zero issues.
The anerobic stuff is spendy and most of us dont have a can lying around.
Just gotta use the High tac sparingly is all
(1) 1995 Suburban 2500 4x4
(1) 1997 Astro
(1) 2005 Suburban (Papa Smurf)
THIS IS BOW TIE COUNTRY
Missy Good Wench ( Moderator)
More good stuff
This last weekend saw the timing gears go in but little else.
I did however yank the heads off the floor and start to clean and ready them to go back on.
Reason, Checkbook is sucking into a vacuum.
Heads looked good but upon close inspection I found some cracks through a couple exhaust seats that went out onto the firedeck.
No dice baby, notta gonna fly this way.
SOOOOOOOOOO off to dig up some heads.
Found a set of rebuilt heads over at the coast. OH YEAH BUDDY.
Well now, good used stuff can be found BUTTTTTTTTTT ya gotta be careful and know what your looking at.
The seller agreed happily to allow Li'll Ol me to pull the valves out one at a time and look things over.
I also took my makita with the big cup brush too.
The first head looked ok with only a small crack on a couple seats. No biggy.
The seats and the valve faces all reflected a recent shopping so the story fit together.
Heads came off a 6.5 that had seen the top end done and then checked a rod only a few months later.
Now
Onto head number two.
Get it on the bench and soon notice that the precup markings are different.
One head has a single small square stamp on the cups and the other has a single round stamp on the cups.
Now ya gotta have all the little critters the same. DONT EVER MIX cups.
They can vary a lot from one marking to the other.
There are Diamond marks (Late 6.5 heads) by what I can find this is supposed to be a universal cup to replace all applications.
The Single dot is a 6.5 as is the single square
There is also a 2 small square dots with a large T
The fire port is nearly as big as the Diamond cup
The inside of these different cups vary in CC capacity too.
There are cups with no markings at all
Some early 6.2 cups have very small ports and also the shape of the port is totally different than the 6.5 stuff.
Here is a pix I took of several cups I now have.
The diamond one came from my DaHooooley engine and has cracks in the corners of the port that go all the way to the fire ring on the gasket.
The T cup is from a set I found that will go in the good heads I got.
The 1 dot and 1 square are from the heads I got at the coast
The one at the bottom is a J code 6.2 cup
The inside is very small compared to the 6.5 cups.
Any time you yank heads off an unknown engine/rig be sure to varify that all the cups are the same.
Having a mixed bag can effect harmonics in the engine due to uneven power strokes
Any type of these cups can be used as long as they are used in sets.
The large port cups are more often found in Federal emission engines such as the F and the light duty 6.5's will likely have smaller ported cups as will Cal. emission engines.
There seems to be little info available readily as to what was used on what engine code and when and why.
Hope this is useful to you folks.
Missy Robyn
(1) 1995 Suburban 2500 4x4
(1) 1997 Astro
(1) 2005 Suburban (Papa Smurf)
THIS IS BOW TIE COUNTRY
Missy Good Wench ( Moderator)
Head tech
OK
Now that the heads are all steam cleaned and I can get close to them.
Time to pull all the valves, springs, shims and other goodies out and tagem and baggem.
These heads will be reused as is and with no machine work.
Its important to keep all the parts as they were when they came apart.
In the pictures you can see the parts stack with a zip tie through the set.
This is the exhaust springs and parts.
The rotators always go to the exhaust valves.
Keep the spring shims where they were.
Usually on a stock engine with factory heads there will be one hardened shim under the spring.
This stops the spring from chewing the head casting .
These heads have a mixture of 1 and 2 shims per setup to allow for the seat grinding that was done.
This will keep the assembled height of the spring correct.
Now the valve seats and ports have been all cleaned with a air powered cup brush.
The precup pockets are all cleaned and the sharp corners where the cup seat are all cleaned and free of carbon and crud
Now Notice the Pix of the valve with the carbon.
These engines will form huge envelopes or carbon on the backside of the intake valves over time.
These heads although not run very long had a large amount of carbon.
This is likely due to bad rings and a great amount of blowby. The intake ports were very wet with oil residue.
The story on the engine these heads came from seemed believable BUTTTTT ya just have to take everything for what its worth.
So far the seats and the valves look fine and will go right back to work.
The next step is to get the heads into the shop tomorrow and have them heated in hot water and pressure tested with 50+PSI air to check for any leaks that may not be obvious.
The heads show no cracks that are of issue. I did find a couple very tiny "Checks" on a couple exhaust seats.
Not worth bolting these on without testing.
The cost of the gasket and Bolts is about $60 per head.
Not to mention the work to get things back apart again.
Once the heads come back from the shop (with a clean bill of health)
A little lube on the stems and back in they go.
Button things back up and good to go.
Just a side note here
A 6.2 or 6.5 that has a lot of miles and has sat for a long period can see these large carbon heaps on the intake valves fall off and go into the cylinder.
This is a nasty situation and will lock the engine up tight.
These carbon cones that form on the valve can be very large. The amount of room on top of the piston is very small and if an engine starts and has this stuff fall into the cylinder, it will hammer like hell.
Any used engine that has sat a long time should at the least have the intake removed and the ports and such inspected for this issue.
If the problem exists the heads need to come off and the intake valves removed and cleaned.
This can do serious damage to the engine if allowed to get into the cylinders and hammer things.
A large enough piece can hold a valve open to the point that the piston swats it and then the problem is even more serious.
Piston damage, rod and crank damage. OHHHHHH My
More coming soon
Robyn
(1) 1995 Suburban 2500 4x4
(1) 1997 Astro
(1) 2005 Suburban (Papa Smurf)
THIS IS BOW TIE COUNTRY
Missy Good Wench ( Moderator)
Used Block
Warning
For anyone rebuilding a 6.2/6.5 engine.
Many of these blocks are up to 27 years old now (6.2) and 17 years on the 6.5
There is a whole lot that can and does happen to these chunks of Iron in this amount of time.
My reason for writing this is simple.
Yesterday the world came to an end as far as My current 6.5 block that was going into the DaHooooley.
Turns out that the "Good High Mile" used block, had sometime in the past been decked on one side and not the other.
Upon inspecting the thing when purchased it needed decking.
The machine shop I used agreed, and WE decked it .015" on the LH side and about the same on the RH side.
Under normal circumstances this would have been fine and a .010" Thicker gasket would have been fine.
Not until I started assembly did it become aparent that the RH side had been decked twice.
So now the pistons on the RH side stick above the deck .030" (approx)
Way too far to be used.
There are many issues that come to play here.
Compresion, valve trian dimensions etc.
Bottom line.
Check any and all blocks before you spend $$$ on machine work.
If its a bare block, drop in a set of front and rear mains, the crank and a piston and rod assembly, one on each side and measure the protrusion above the deck.
Be sure you buy with care and get it in writing that the thing is useable.
Best
Robyn
Last edited by Robyn; 07-05-2009 at 19:49. Reason: addition
(1) 1995 Suburban 2500 4x4
(1) 1997 Astro
(1) 2005 Suburban (Papa Smurf)
THIS IS BOW TIE COUNTRY
Missy Good Wench ( Moderator)
More tech tips
Here are some current pix of the timing gears and chain
These are very self explanatory.
The one thing though being, the timing marks on the Pump drive gear also align with the crank gear when being assembled.
Once the gears and the chain are on the crank can be turned to place the pump drive gear with the mark to the top of the engine.
The actual pump gear can then have its mark aligned with the drive gear.
The bolts that hold the gears to the cam and to the pump need to be retained with Blue Loctite.
If these come out its GAME OVER and parts will crash and break
Another item is keeping the project clean while its being worked on.
A plastic garden/ trashbag works sweet to slide over the little beast after a session to keep dust and other crap out.
Missy
(1) 1995 Suburban 2500 4x4
(1) 1997 Astro
(1) 2005 Suburban (Papa Smurf)
THIS IS BOW TIE COUNTRY
Missy Good Wench ( Moderator)
More good stuff
Many Pix
(1) 1995 Suburban 2500 4x4
(1) 1997 Astro
(1) 2005 Suburban (Papa Smurf)
THIS IS BOW TIE COUNTRY
Missy Good Wench ( Moderator)
More pix of the assembly tips
(1) 1995 Suburban 2500 4x4
(1) 1997 Astro
(1) 2005 Suburban (Papa Smurf)
THIS IS BOW TIE COUNTRY
Missy Good Wench ( Moderator)
Another important area to clean up
The RH reaR OF the block just below the deck and around the back of the cylinder case.
The glow plug wires and a few other important wires lay in this area.
They feed behind the heat shield and over the starter.
The nasty flashing on the casting has, can and will tear up the wiring.
You can see in the pix that this area has been ground smooth.
Takes only a few minutes and will save a buttload of grief later on if you get a short in the wiring.
Robyn
(1) 1995 Suburban 2500 4x4
(1) 1997 Astro
(1) 2005 Suburban (Papa Smurf)
THIS IS BOW TIE COUNTRY
Missy Good Wench ( Moderator)
The 6.5 TD project has come to a successful conclusion.
Anyone needing specific advice or that have questions are more than welcome to either post to the 6.5 board or PM me with any questions.
Thanks
Robyn
(1) 1995 Suburban 2500 4x4
(1) 1997 Astro
(1) 2005 Suburban (Papa Smurf)
THIS IS BOW TIE COUNTRY

 Where there's smoke.... There's fire!
Hi, all.
I am currently rebuilding my own dually, and ran into a couple of things I thought might be helpful.
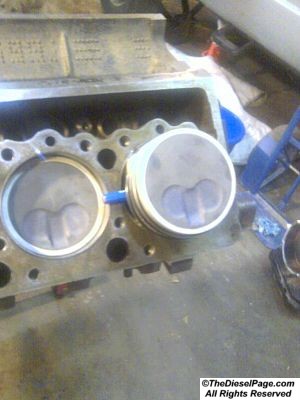
First is the picture below. Notice how the bearing covers one side more than the other? This "empty" side should be assembled to the outside of the rod journal. On my rods, I noticed that correctly assembled with the "empty" to the outside all of the stamped numbers faced away from the crank.
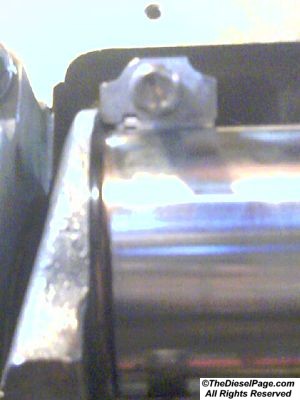
This next picture shows the rod half snugged up on the journal. It is a bad picture but if you look closely you can see that the bearing is absent from over the deep rolled fillet on the outside of the journal. This is why the bearing as seen in the first picture doesn't cover all of that side.
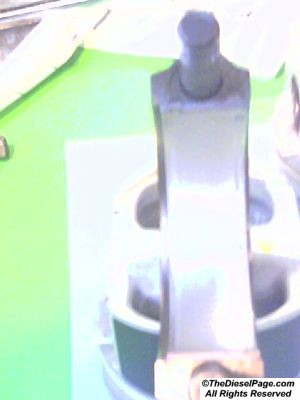
This next picture just shows me using a long punch inserted through the piston pin to hold the piston just out of the cylinder. This trick holds the piston in place so I can get the ring compressor around the rings while it is sitting in the hole.
Hope these help someone. I will try and add more as I come across it.
1996 GMC K3500 Crew Cab Dually 8ft bed
Rebuilt engine 2/10 18:1 pistons, forged crank, Fluidamper, dsg gear drive timing, high flow oil pump, rebuilt GM8, turbomaster, Kennedy ECM, 4" exhaust, wrapped cross-over and down pipe, '98+ cooling, Duramax fan, aftermarket oil cooler and hoses
Rebuilt tranny 2/10
Missy Good Wench ( Moderator)
Thank you for sharing.
Great stuff for those just getting their wrenching "FEET" wet
Believe me, I have seen engines put together with the rods in Backwards
I have personally pulled apart a 6.2 that had the recardo bowls (Indents in pistons) at the top of the cylinder instead of the bottom.
They will run that way.
Oh yess all these little things are very usefull
Thanks again
Missy
(1) 1995 Suburban 2500 4x4
(1) 1997 Astro
(1) 2005 Suburban (Papa Smurf)
THIS IS BOW TIE COUNTRY
Where there's smoke.... There's fire!
On my 599 block (I will assume all 599's until someone corrects me) the oil cooler by-pass valve (this is the one close to the block and covered by the freeze plug thingy) is acdelco part #25161285. The oil filter by-pass valve is the same as is used on the 6.2l block. It is acdelco part #25011206. These parts are getting hard to source. Bottom line, don't let your machine shop toss the valves!! If you have a later block the oil cooler by-pass is the same number as above but the oil filter by-pass is acdelco part #25014006.
Also on my 599 block the oil pump bolt is 10mm where the later blocks are 12mm. Just some things to be aware of.
1996 GMC K3500 Crew Cab Dually 8ft bed
Rebuilt engine 2/10 18:1 pistons, forged crank, Fluidamper, dsg gear drive timing, high flow oil pump, rebuilt GM8, turbomaster, Kennedy ECM, 4" exhaust, wrapped cross-over and down pipe, '98+ cooling, Duramax fan, aftermarket oil cooler and hoses
Rebuilt tranny 2/10
 Posting Permissions


 Reply With Quote