
They did not show in the PM.Originally Posted by Yukon6.2

Thanks! Coming from you Robyn... That means a lot!


 Enthusiast
They did not show in the PM.
Thanks! Coming from you Robyn... That means a lot!
Enthusiast
I took the injector lines off so it’s easier to clean up the intake holes. I’ll install the intake manifold after I do the coolant pressure test. I can not do the coolant pressure test until the thermostat shows up at the parts store. Hopefully tomorrow...
I deleted the glow plug sensor. I might put a coolant pressure gauge there. Have not decided yet.
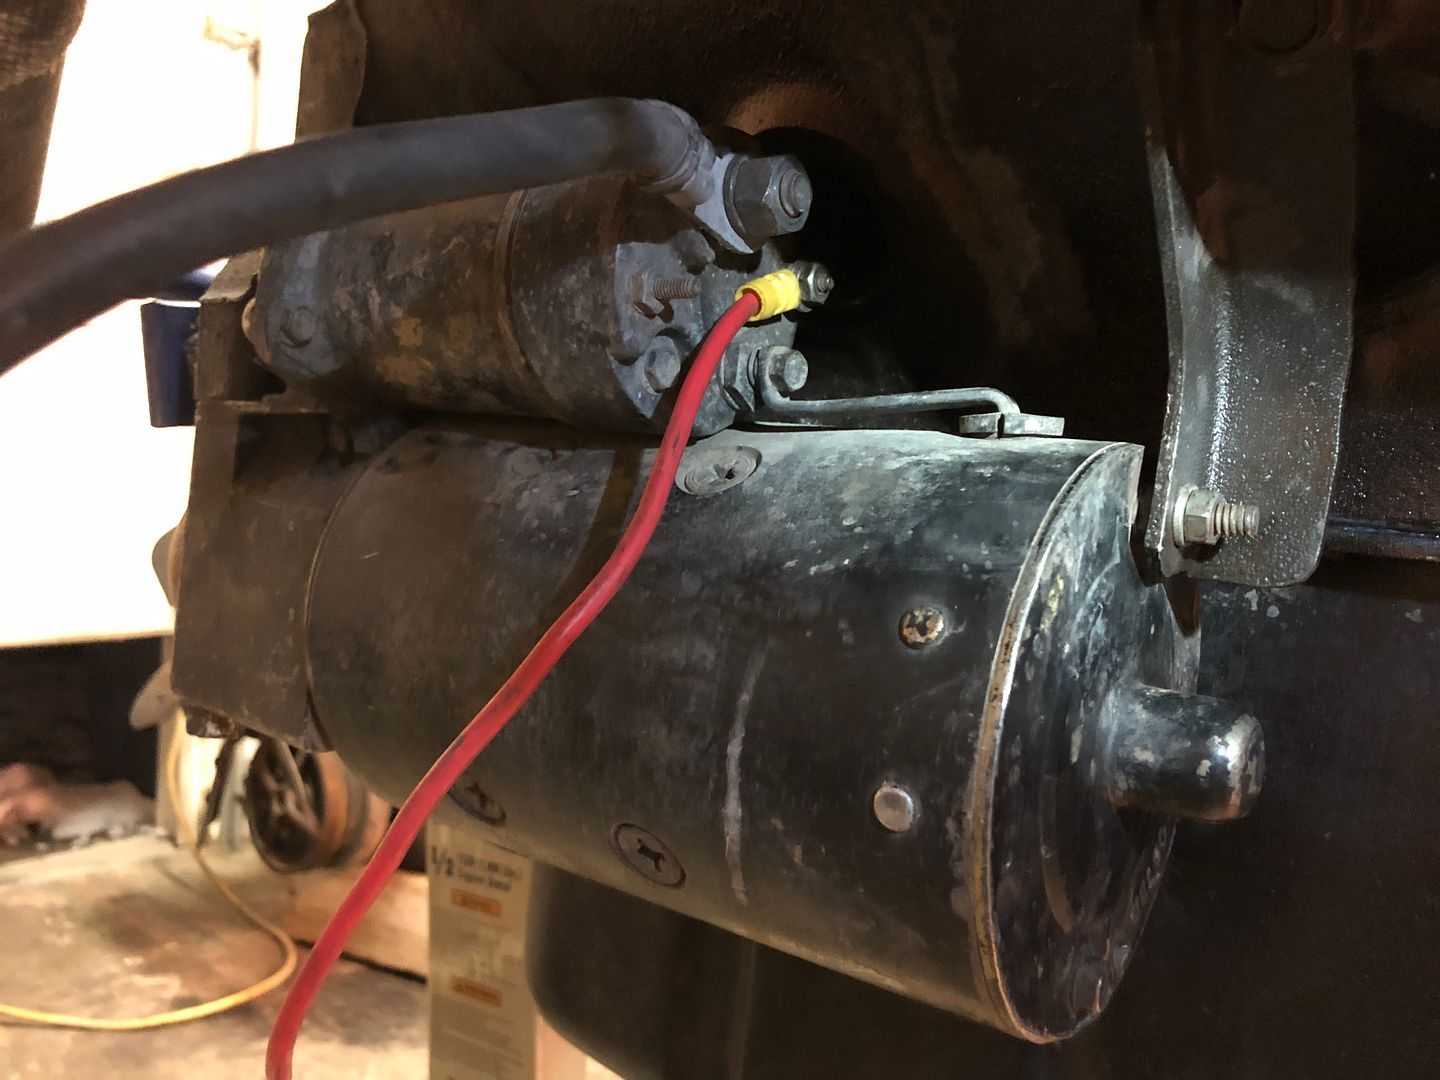
Also got the starter on and wired it up with some extra wire I had laying around.
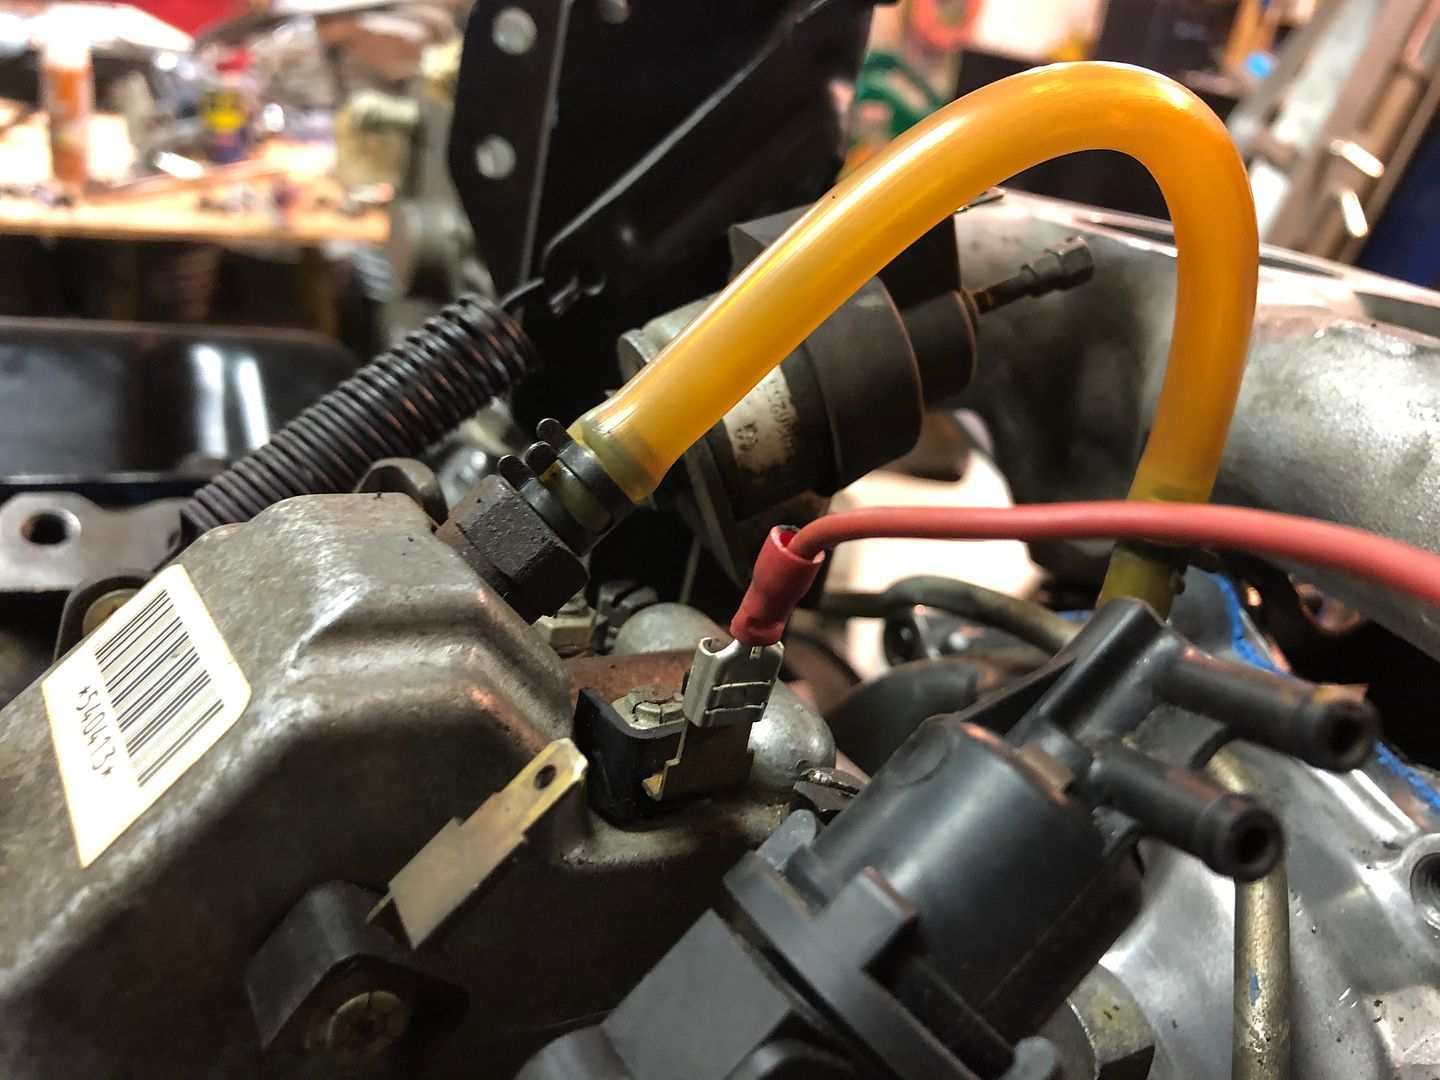
Got the IP wire ready.
Next I installed the oil dip stick with a new O-ring and some Ultra Blue to go the extra mile to prevent leaks since that is prone to leak.

Enthusiast
My email is solotwin at yahoo dot com if you email me i will try and send them to you.
90 Chev 3500 c/c 4x4,6.2na,400 auto,4:10 gears.DSG Timing gears,main girdle, isspro tach, pyro,boost,oil and trany temp.Dual Tstats, High volume peninsular pump,on shelf, Custom turbo and intercooler 85%complete. Change of plans for the dually, it's going to get a Cummins. Both trucks are Blue 90 4x4 crews
Enthusiast
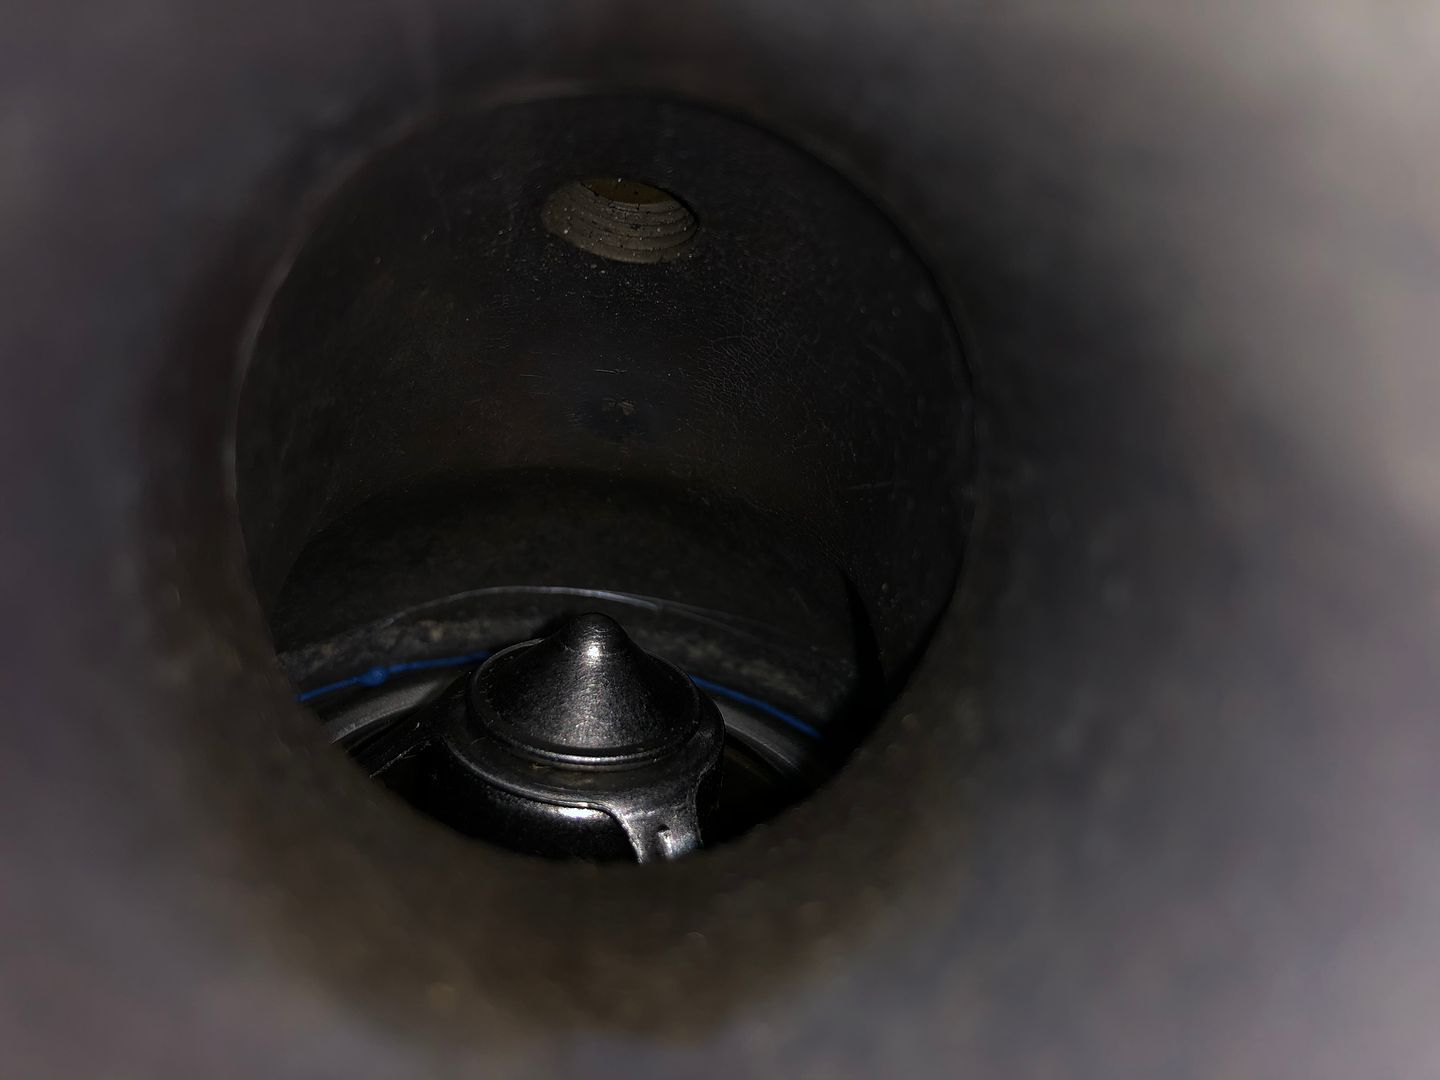
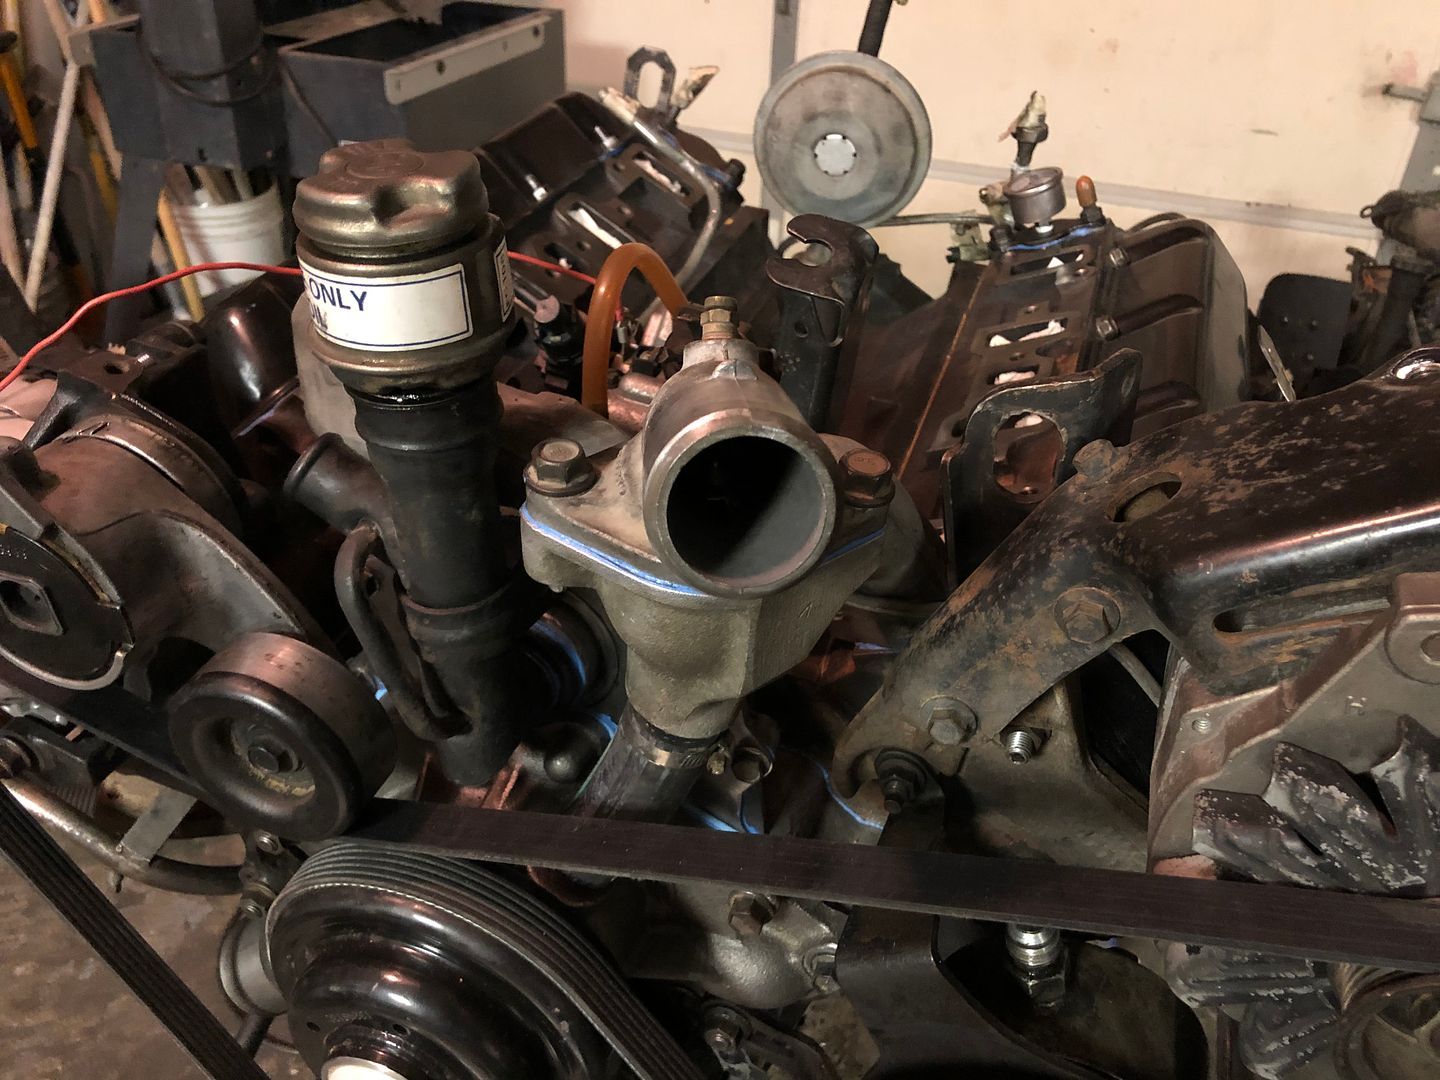
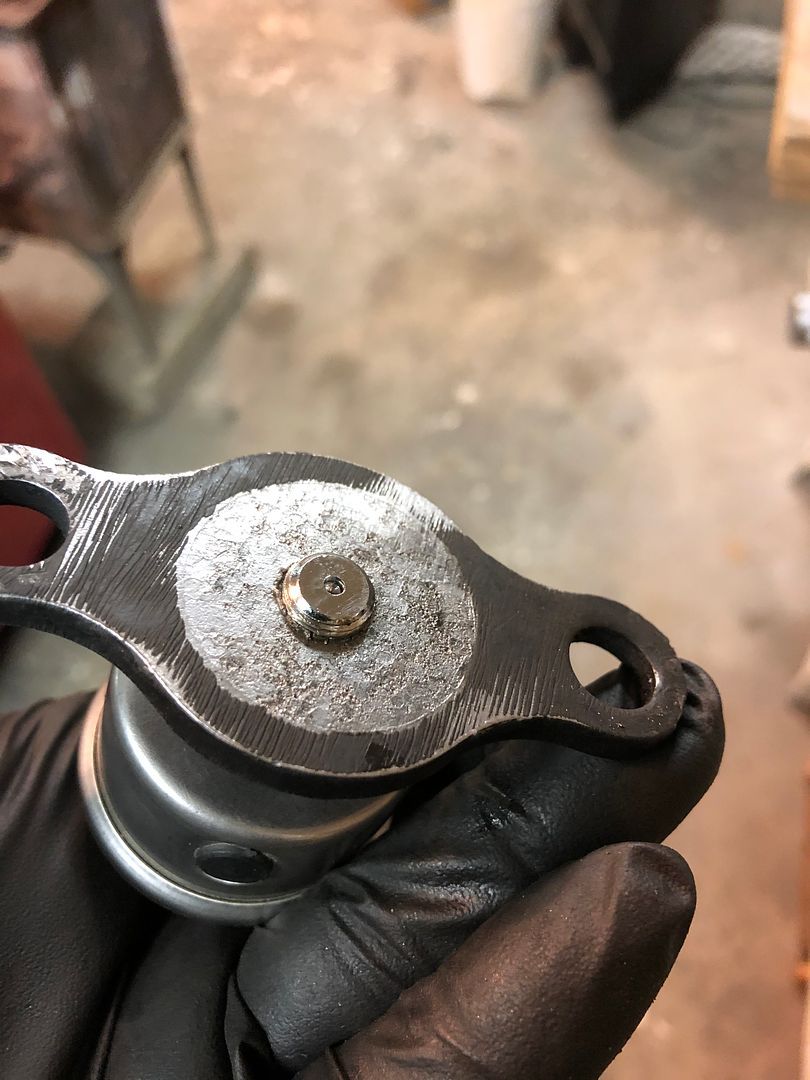
The Thermostat showed up. The darn thing was $41... I installed it with a gasket and finger painted a light coat of Ultra Blue on both sides of the gasket since there was a lot of corrosion and pitting.
Also I installed a coolant pressure gauge in place of the deleted glow plug temperature sensor after taping it. 15 psi max might not be enough because I’ve seen coolant pressures get up to 17 psi. I’ll order a different one but use this for the time being since I had it laying around...
After a few days of letting the RTV cure, I’ll finally get the pressure test done on the coolant system.
Enthusiast
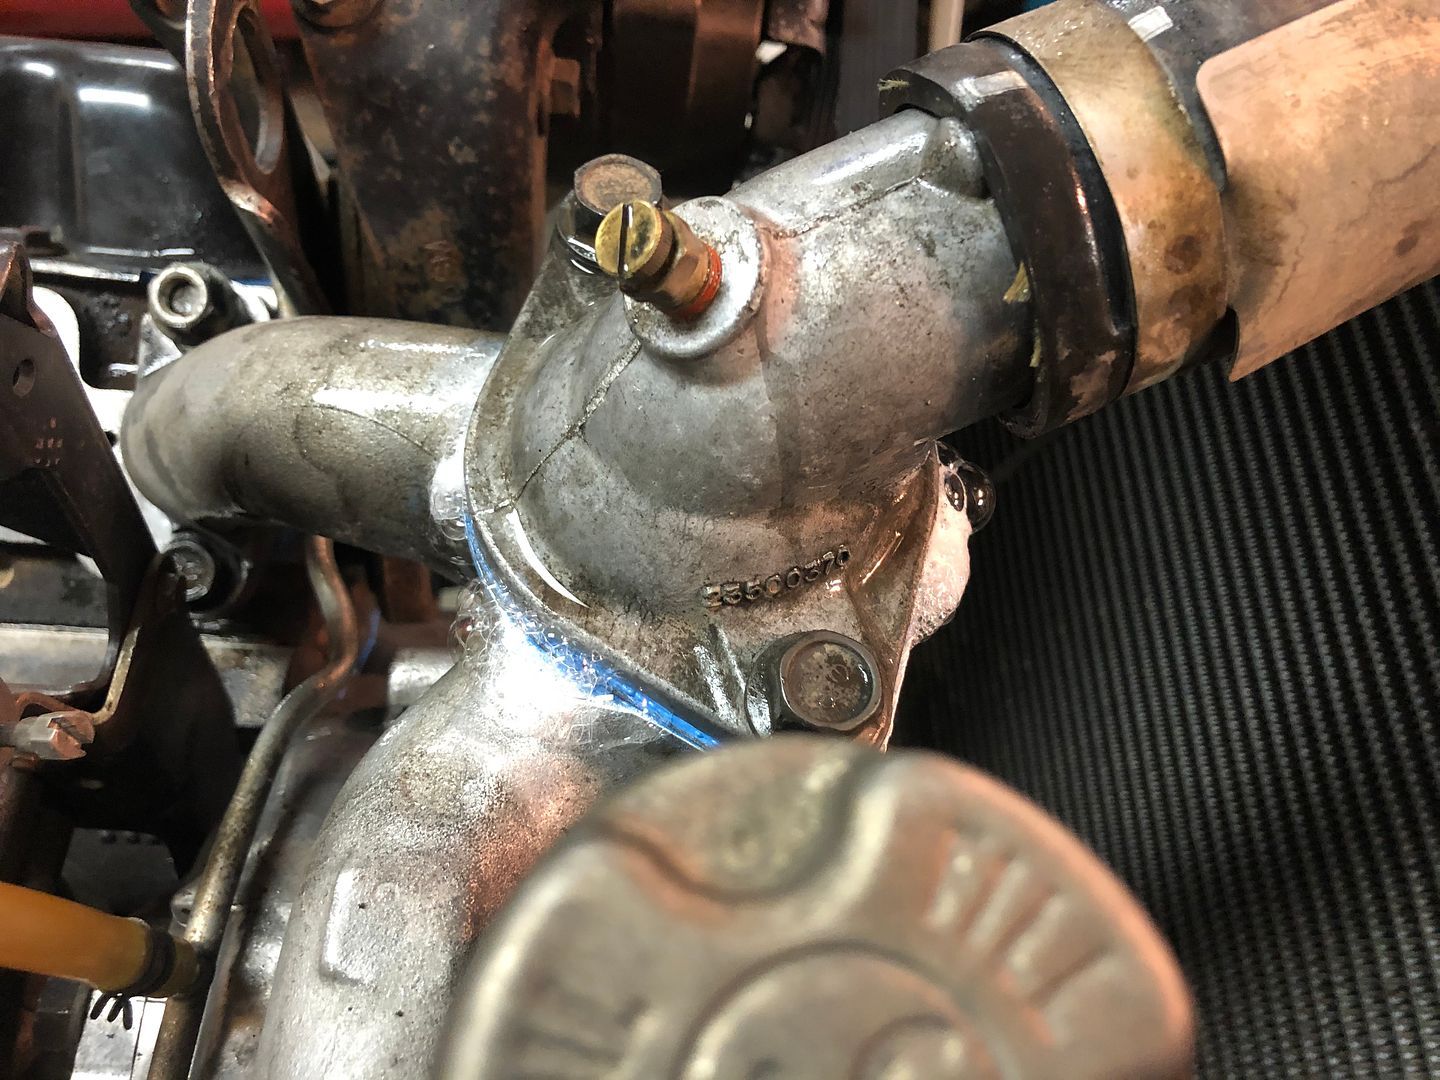
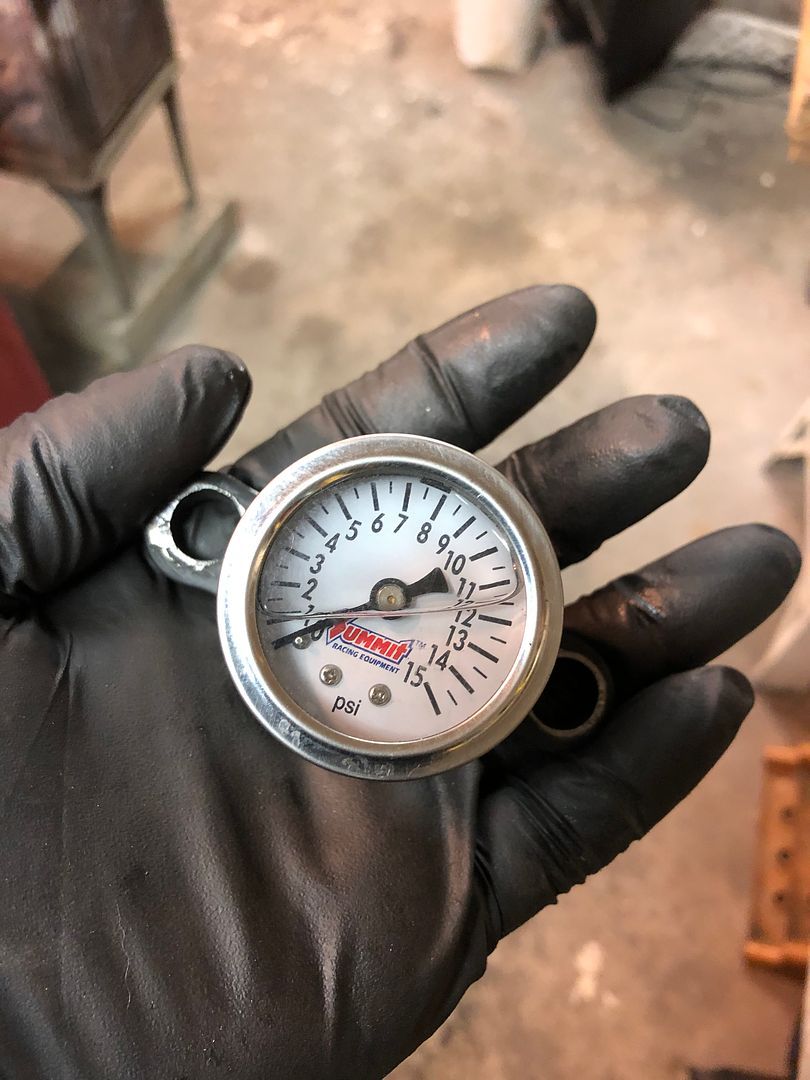
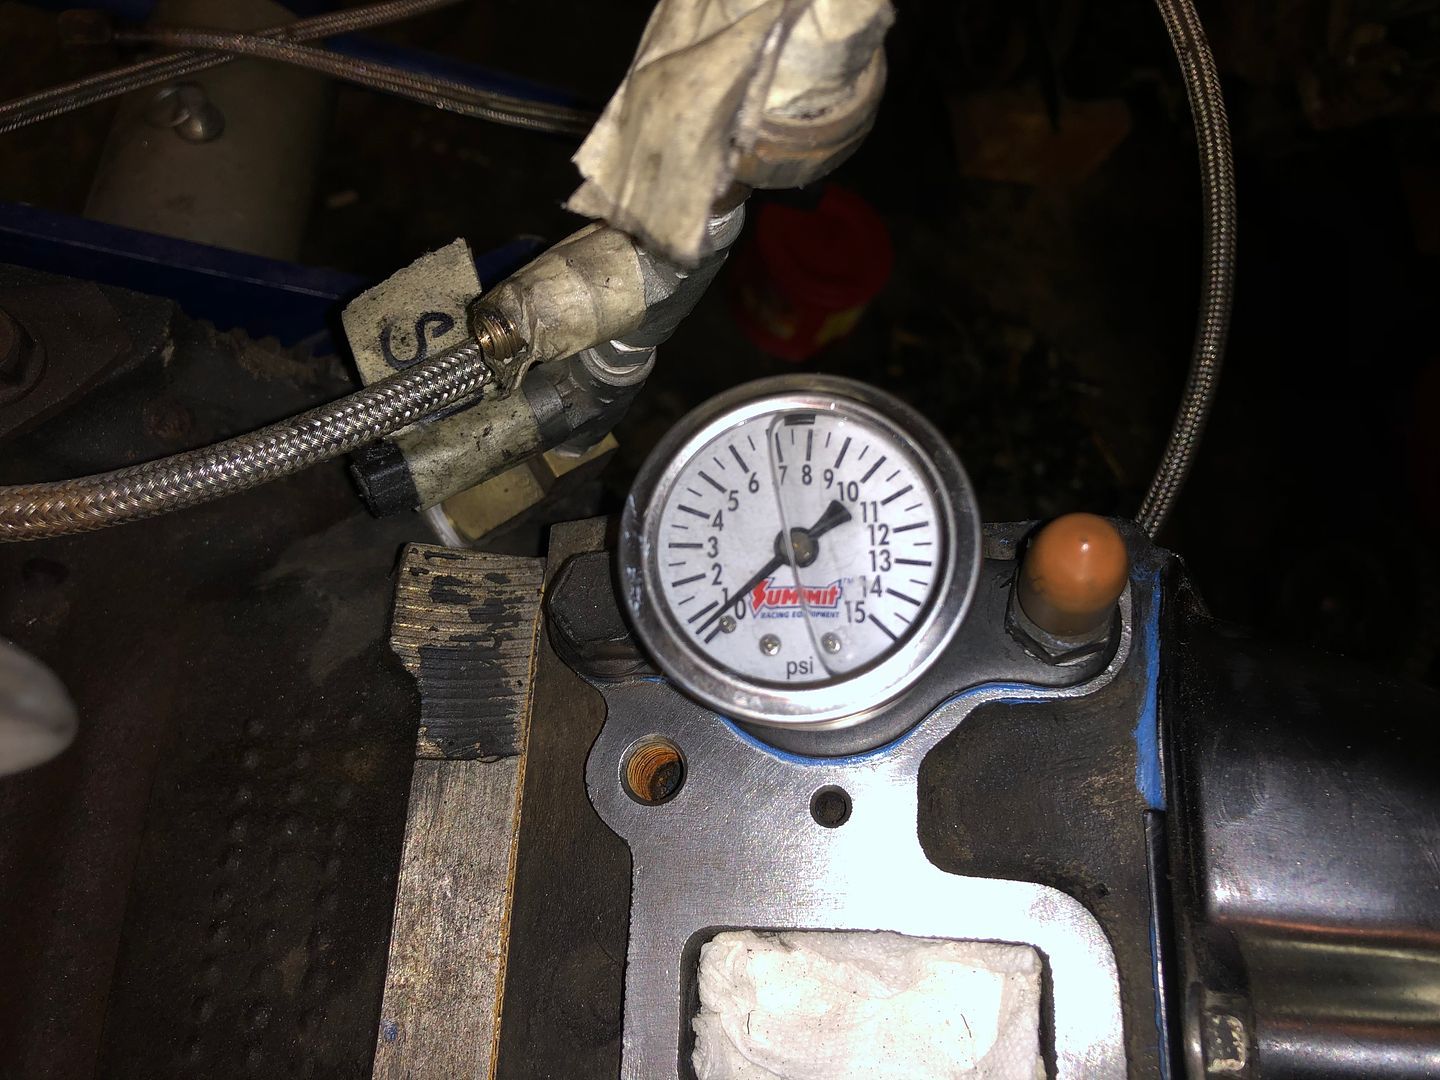
Today I hooked up the custom 4 core 6.2 diesel radiator and started the Coolant Pressure testing. I pumped the pressure to 15 psi. She is leaking 1 psi per 5 minutes. So quiet I could not hear it. I used soapy water in a spray bottle and sprayed every single spot associated with the cooling system. There was only one spot that was slowly leaking... It was the recently installed thermostat gasket with rtv. My assumption is that the 24 hour cure time needs to be increased by at least a few days. Here are pictures of coolant test number 1.
Enthusiast
Banks Pyrometer fitting installed on the Exhaust Manifold.
Also installed the Banks rubber caps for the intake manifold. It’s design deletes the CDR hoses from going directly into the intake manifold. It is redesigned to go into the banks air filter housing.
.HEIC)
Enthusiast
Off work early today. Helped the Wife clean the house and finished installing the Exhaust Crossover.
Then I installed the Water Pump Hose Heat Shield. Crossover appears to be in the way of the water pump hose. It is going to be a pita to install the water pump hose with the heat shield on. I have read that some people delete that heat shield because of how much of a Bixxx it is to get that hose on. We will see when I am ready to do the second coolant pressure test.
For the thermostat gasket, I choose to use Felpro this time. I also did a decent sized bead of Ultra Blue on each side of the gasket. I’ll give it 3 days of cure time before the next test.
.HEIC)
Enthusiast
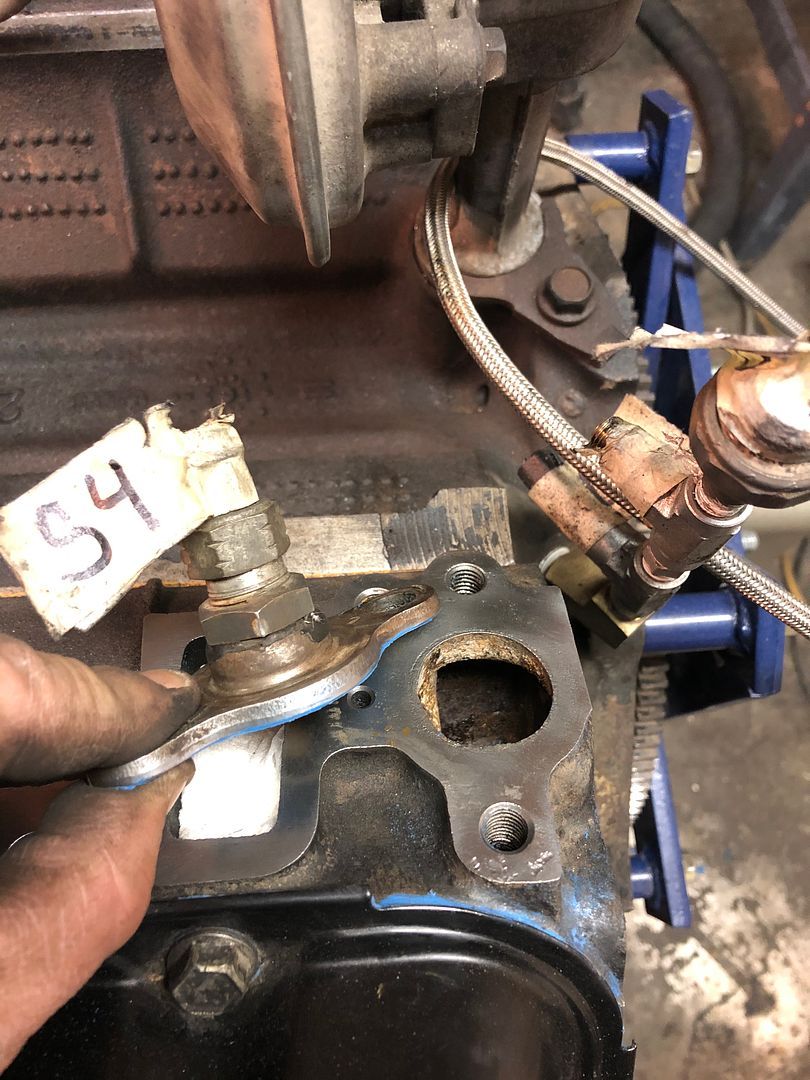
Next I cleaned the intake holes with brake cleaner and installed the new Felpro gaskets.
Some porting food for thought on the next motor build...
I blew out the injection lines with compressed air and cleaned the ends of the injection lines with a paper towel and brake cleaner.
Using brake cleaner and Q-Tips, I cleaned the injector ends and injector pump ends.
Fuel lines installed again...
.HEIC)
Enthusiast
I cleaned up the intake manifold with brake cleaner and paper towel.
The intake manifold was hitting the cheap LMC truck valve covers. I used my die grinder and took off some metal from the valve cover so the intake manifold fits.
I installed the intake manifold. Torqued to 31 foot pounds after putting blue thread sealer on the threads.
Installed the J-Code Alternator support rod.
The banks installation manual shows a Civilian CDR. I might have one in the spare parts box. But I am going to hold off on the CDR because I would like to attempt hooking up the air filter housing to the snorkel which means CDR can’t be determined yet.
.HEIC)
Enthusiast
Next I wire brushed the Ultra black off of the Banks Air Hat.
Then I cleaned the air hat in the sink with soap and water.
Here’s pictures of the air hat all cleaned up and dried.
Looking at the installation instructions, I installed the correct washers, studs and nuts for the air hat, along with my original round gasket to seal the air hat and intake.
Air hat installed...
.HEIC)
Last edited by 2INSANE; 11-14-2020 at 20:05.
Enthusiast
Intake/turbo tube installed... I used the original rubber boots since they are still in great shape. Just dirty. Waste not... Save more$
Since I am on a roll today, I also installed the turbos oil fill line and used zip ties to keep it secure...
.HEIC)
Enthusiast
Keeping the garage warm for a few more days before I do the 2nd coolant pressure test which gives the Ultra Blue more time to cure.
I ordered a 0-30 psi 1/8 NPT coolant pressure gauge for the rear driver side coolant plate to replace that 0-15 psi gauge.
I also need more braided fuel hose for the return line.
Last edited by 2INSANE; 11-14-2020 at 20:06.
 Enthusiast
I like your fingernails holding that turbo pipe. Where you getum done at?
"The Constitution is not an instrument for the government to restrain the people, it is an instrument for the people to restrain the government."
-Patrick Henry
A5150nut
2006 K3500 D/A
94 6.5 4x4 5spd Sold
Enthusiast
That’s Santa’s little Elf helper! Lol!
Enthusiast
For educational reasons only, I mocked up the CUCV J-Code CDR valve to check fitment. It appears to work well with the Banks kit. The bottom inlet seems a little tight at an angle. Actual CDR location is not determined yet.
I also capped off the Pyrometer fitting temporary for the test runs..
I also got 2 matching intake air hat nuts installed. Grade 8.
.HEIC)
Enthusiast
Picked up some free stainless steel sheet metal at work. I used my tin snips and made my own turbo heat shield. It will protect the 6.5 Alternator that has plastic on the back of it and protect other things as well.
.HEIC)
Enthusiast
Last night the 1/8 NPT 0-30 psi coolant pressure gauges arrived in the mail. I replaced the 0-15 gauge and installed the 0-30 gauge on the driver side rear coolant plate.
I also installed a 0-30 psi 1/8 NPT coolant pressure gauge on the front top thermostat housing neck replacing the necks OEM fitting.
Went on a parts run to O’REILLY auto parts, I bought 4’ of fuel line for the return to fuel, 4’ of Red battery cable 4 gauge, 4 butterfly battery terminals and 4 battery cable connector ends. I hooked the battery’s positive to negative which reads 12 volts and the positive end to the starter which reads 24 volts and the negative end (Ground) to the bottom driver side motor mount holes.
Using thick gauge stereo speaker wire, I hooked up the glow plugs after I tested the glow plug ohms and connected the ends of all 8 wires together and crimped a connector on. I tested all 8 plugs which read 11.25 volts. Plenty for the G60s.
.HEIC)
Enthusiast
I installed the fuel hose and return line with just a few inches from the floor so I can use a diesel fuel can to put them in.
Here’s wire for Starter Solenoid.
Here’s wire for the Injection Pump.
I hooked up my Racor fuel filter/housing and wire tied it to the motor. The Racor housing has a primer on it. It will help me prime all the air out for an easier first start. This upgrade is up for sale. Send PM if interested. Spin on type that replaces the OEM box filter. Bolts right up to the existing firewall holes.
.HEIC)
Enthusiast
Good news and bad news!
The good!
Racor fuel filter/housing is sold.
I filled up the oil a few days ago and drained it last night. It was extremely dirty from doing all that work to the motor. I filled it up again and started the motor for 1 minute dry of coolant.
It runs very good! No white smoke, no blow by.
The Bad...
Because of the location of my snorkel, I determined the best CDR for my needs will be the 6.5 CDR with the 6.5 CDR valve cover and 6.5 oil filler tube. This means I get to take apart the top end of the motor again! Fun!
More Bad...
The belt I used stretched sooo much that I am going to have to go down a size because the Tensioner Pulley is getting dangerously close to the Water Pump Pulley. Why? The water pump I choose to use has a wider Pulley then the stock 6.5 bolt on Pulley.
Will get you pictures and video after I release these 6.2/6.5 Demons.

Last edited by 2INSANE; 11-18-2020 at 08:47.
Enthusiast
IDK why the shop put the Phantom 2 oil temperature gauge sensor on this ridicules long tower of fittings! The gauge never read over 100 degrees... Now I know why! Lol! I am removing this sensor and will put it on the oil pan somewhere.
Temporarily I also removed the mechanical Phantom 2 Oil pressure fitting for the test runs leaving just the stock oil pressure sensor for now.
.HEIC)
 Posting Permissions


 Reply With Quote
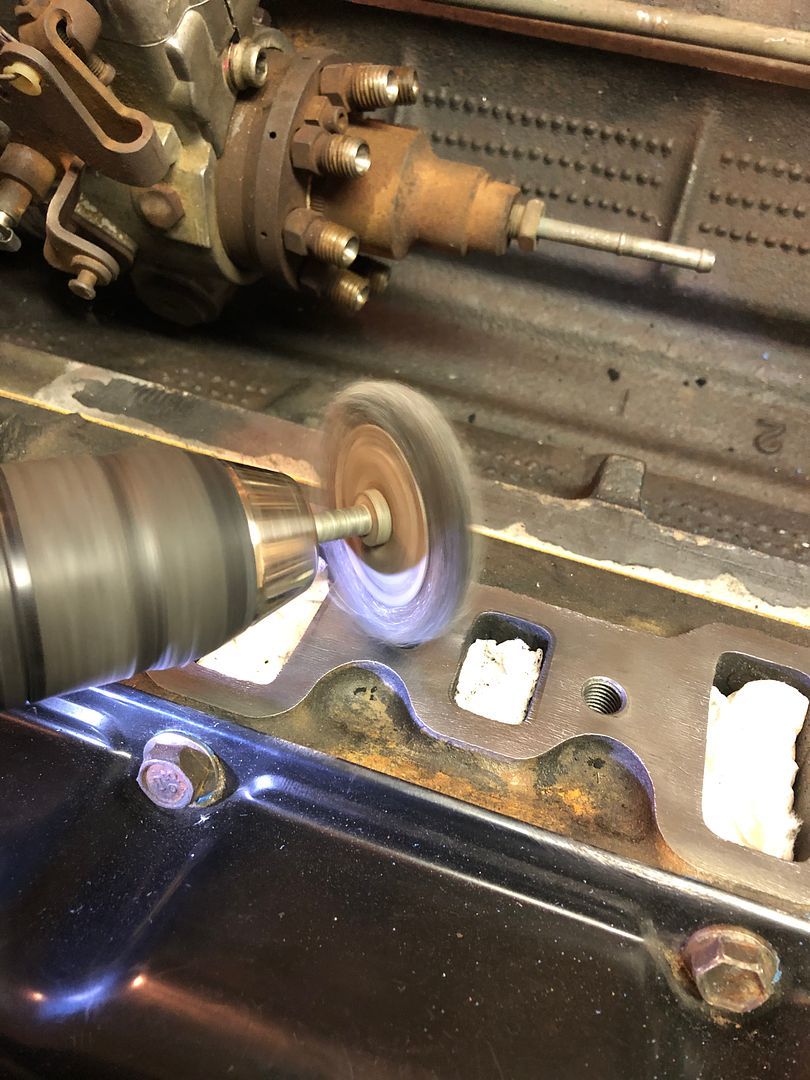

.HEIC)
.HEIC)
.HEIC)
.HEIC)
.HEIC)
.HEIC)
.HEIC)
.HEIC)
.HEIC)
.HEIC)
.HEIC)
.HEIC)
.HEIC)
.HEIC)
.HEIC)
.HEIC)
.HEIC)
.HEIC)
.HEIC)
.HEIC)
.HEIC)
.HEIC)
.HEIC)
.HEIC)
.HEIC)
.HEIC)
.HEIC)
.HEIC)
.HEIC)
.HEIC)
.HEIC)
.HEIC)
.HEIC)
.HEIC)
.HEIC)
.HEIC)
.HEIC)
.HEIC)
.HEIC)
.HEIC)
.HEIC)
.HEIC)
.HEIC)
.HEIC)
.HEIC)
.HEIC)
.HEIC)
.HEIC)
.HEIC)
.HEIC)
.HEIC)
.HEIC)
.HEIC)
.HEIC)
.HEIC)
.HEIC)
.HEIC)
.HEIC)
.HEIC)
.HEIC)
.HEIC)
.HEIC)
.HEIC)
.HEIC)
.HEIC)
.HEIC)
.HEIC)
.HEIC)
.HEIC)
.HEIC)
.HEIC)
.HEIC)
.HEIC)
.HEIC)
.HEIC)