Page 4 of 7 FirstFirst 1234567 LastLast
Results 61 to 80 of 131

Thread: Duramax Head Gasket Replacement

  1. #61
    Join Date
    Apr 2001
    Location
    Newberg Oregon
    Posts
    12,294

    Default

    With a basic "Pop" tester you can check the pop pressure and observe the spray pattern.

    Not quite as good as the tooling the big boys have....but you can get the job done.

    Replace the nozzles and a few other small parts.... then shim the springs to get the pop pressure right.

    I have done a few sets of "Squirts" for the 6.2/6.5 and other than the time to fool with them....They were fine......

    I can't imagine the units for the DMAX being any tougher to do...

    The LB7 squirts from what I have read were basically flawed from the get go and tend to be very fussy about any dirt in the fuel......

    Be fun to rip into a set and give it a go.....
    (1) 1995 Suburban 2500 4x4
    (1) 1997 Astro
    (1) 2005 Suburban (Papa Smurf)
    THIS IS BOW TIE COUNTRY

  2. #62
    Join Date
    Apr 2001
    Location
    CA
    Posts
    13,576

    Default

    Quote Originally Posted by Robyn View Post
    With a basic "Pop" tester you can check the pop pressure and observe the spray pattern.

    Not quite as good as the tooling the big boys have....but you can get the job done.

    Replace the nozzles and a few other small parts.... then shim the springs to get the pop pressure right.

    I have done a few sets of "Squirts" for the 6.2/6.5 and other than the time to fool with them....They were fine......

    I can't imagine the units for the DMAX being any tougher to do...

    The LB7 squirts from what I have read were basically flawed from the get go and tend to be very fussy about any dirt in the fuel......

    Be fun to rip into a set and give it a go.....
    In theory.

    But, it isn't that simple. I'm not too optimistic. Parts can be replaced, but that's about where it ends for the consumer. Capable test equipment would be necessary, as well as tools and a clean environment. The parts are relatively inexpensive and available, and not too difficult to replace, which creates a difficulty (at least for me) in seeing where the replacement cost of reman's comes from. I suspect they charge what they do, simply because they can. Bosch factory new and remans are costly, and non-Bosch rebuilders base their pricing on the Bosch list price. The actual cost of rebuilding these things is MUCH less than what they sell for. The profit margin is ridiculous, at more than 300%. I've researched it, and that's the most generous figure I can come up with. The parts, tools, labor and time just do not add up. For the cost of 2 or 3 retail injector sets, a shop can fully equip a station capable of quality full rebuilds, and a full set can be rebuilt and tested in a couple hours or less. Of course, it isn't that simple, but it certainly is not 300-500% more complicated. The same argument can be made of 6.2 and 6.5 injector pumps.

    The LB7 injectors can see up to 23K PSI (later models are significantly higher), and idle at 4K+, and are fired by a solenoid, and will fire multiple times for each injection event (pilot injection, up to about 2700 RPM's). The volume of fuel is similar to the 6.5, but at the LB7 pressures, as with any hydraulic system, pressure and volume can be traded. Increased pressure decreases necessary component volume for the same fluid volume. Contamination becomes much more critical as the component parts become smaller. Herein lies the problem. The internal fuel volume components of the Duramax injectors must be very small, and meter fuel precisely. Known material failures aside (there have been a couple), that high pressure working against the tiny components results in erosion over time, which is also more rapid with greater fluid contamination. SAC nozzle injectors address much of the durability issue, but at a cost of less precision. Everything is a trade.
    1985 Blazer 6.2
    2001 GMC 2500HD D/A
    dmaxmaverick@thedieselpage.com

  3. #63
    Join Date
    Feb 2006
    Posts
    185

    Default

    Quote Originally Posted by More Power View Post
    If money is no object, we would all live life differently and make different decisions regarding diesel engine service. Fact is, the ARP head studs are $650 and the factory TTY bolts are about $100.

    Take an old truck to a diesel shop or dealership, and ask them to install a new head gasket kit ($400), ARP head studs ($650), new injectors ($2400), new injector hard lines ($650), new water pump ($125), new hoses and an endless list of "as long as we're in there" stuff, and of course at least $5k in labor - and you've made a bad decision regarding financial common sense - i.e. spending $10k+ on a truck that in even perfect condition is still only worth 10K. When faced with that reality, most thinkers will crush/part-out the truck and not spend a dime on it... We didn't even talk about brakes, ball joints, steering components, drivelines, tires, rust... and on and on and on...

    Meanwhile, our performance 6.5TD Project ran without a problem to 300,000 miles in 7 years using TTY head bolts (till we sold it), and my 2001 GMC ran to 140,000 miles using TTY head bolts - even with the poorly designed factory crimped-style head gaskets. I get where the ARP stud advocates are coming from. I can actually read the engineering specs and understand the logic. This is partly why I installed ARP studs in my own 2001 GMC LB7 head gasket repair. I spent extra on this truck only because I did the work (and because I needed to say I did it, could photograph it and eventually write about it). It's just that at some point, people need to make a decision... Crush the truck or do what is necessary to save the truck without compromising basic service and dependability while not violating financial common sense. As part of an overall budget strategy, the lower cost TTY head bolts fit into that paradigm. Lil Red is getting TTY bolts.

    What would mean most to me regarding this discussion about the value of studs/bolts is to study the actual service histories comparing engines built with studs/bolts along with a description of how the trucks were used, and then be able to discern some sort of recommendation from that. Right now, the stud advocates "say" they are better... We can read about tensile strength and a wide range of other stuff, but what's that mean in the real world to average truck owners?
    My mistake. You had replied to a post from Robyn where she was writing about power levels in a 6.5 and I assumed your prices listed were for that engine.

  4. #64
    Join Date
    Feb 2000
    Location
    Montana
    Posts
    11,398

    Post

    Quote Originally Posted by DmaxMaverick View Post
    ...The parts are relatively inexpensive and available, and not too difficult to replace, which creates a difficulty (at least for me) in seeing where the replacement cost of reman's comes from...
    That's the crux of what I'm talking about.

    There are a lot of really good vendors out there - who have done a lot to push forward the service and performance of these diesels. But... it is a business, and some, unfortunately, are losing sight of the big picture. Unaware of what is happening, they are driving out both the older trucks and those new (read young) diesel owners who are the future of the market.

    I've watched a lot of youtube videos recently about a range of Duramax repairs. Most of the videos are produced by 20-somethings to 30-somethings, some even doing the work (big jobs) in a car port... some in northern winter weather. Many are doing it because they can't afford a newer truck or can't afford to hire the work done. Everyone should realize that these are the new truck buyers a decade from now... unless the cost of repair parts drives them running and screaming away from diesels in general and the Duramax in particular. Generally, it's the kids who are buying many of the 10-20 year old trucks. GM has a stake in all this (creation of owner loyalty)... So does the aftermarket.
    Last edited by More Power; 09-16-2021 at 10:52.

  5. #65
    Join Date
    Feb 2000
    Location
    Montana
    Posts
    11,398

    Post

    Something new! I pulled all 8 of the injector cups from the heads in Lil Red. Seven of the cup seating areas inside the heads looked pretty much identical to the following image.


    I noticed while pulling the injector cups from this set of heads that they pulled quite a bit easier than they did from the heads in my GMC. It appears that there was very little sealant used on the cup tips when installed at the factory.

    The following cup seat image shows what looks like carbon tracks due to a combustion pressure leak. The stainless steel cup had matching identical discoloration on it as well. Sorry for the slightly out of focus image. It's hard to get the camera to focus that deep into the head. I should have used a pre-set focal distance setting on my DSLR with an F11 or smaller aperture, but I didn't want to fiddle with it (end of a long day). So, I used my iPhone. This is the #8 cylinder, where the slightly loosened head bolts were found. Possibly the result of the nitrous...

    Last edited by More Power; 09-16-2021 at 10:50.

  6. #66
    Join Date
    Apr 2001
    Location
    CA
    Posts
    13,576

    Default

    That's an absolute indication of....something. Likely, at least, a contributor to your pressurized coolant. What's the origin of the engine? I'm sure we discussed it before, but I don't recall.
    1985 Blazer 6.2
    2001 GMC 2500HD D/A
    dmaxmaverick@thedieselpage.com

  7. #67
    Join Date
    Apr 2001
    Location
    Newberg Oregon
    Posts
    12,294

    Default

    I agree on the small parts, high pressure and erosion..

    At the pressures used in these systems it takes little abrasive to go to work on the metal.

    When you consider the amount of time these parts are subjected to the abuse they take.....no wonder at all that they wear out.

    Old school squirts like the 6.2/6.5 are pretty basic.....add the electronics to the mix and the issues get far more complicated.....A simple pop tester will not operate the Dmax injector.....

    Working in a clean environment is an absolute.....
    Follow factory protocols for the rebuild....No different than anything else we do when building an engine.
    Can it be done at home in the garage.....yup.....I would not hesitate to go at it....just need specs on stuff is all.

    I rebuilt several sets of Squirts for various 6.2/6.5
    Are the ones done by many so called experts any better. ??????? Depends on the tech doing the job....Does he care about quality and is as finicky as we would be.....Big IF right there...

    As far as pricing goes...

    Here is an analogy of WHY THE COST.

    I priced out new track belts for my cat project.
    Go to snow cat supply company....1 belt 8" wide and 287-1/2" long $595 per belt

    Go the the people who make the belting and spec it out $180 per belt for the same part..

    BECAUSE THEY CAN CHARGE UP THE WAZOO.....and they will do so......
    (1) 1995 Suburban 2500 4x4
    (1) 1997 Astro
    (1) 2005 Suburban (Papa Smurf)
    THIS IS BOW TIE COUNTRY

  8. #68
    Join Date
    Jan 2001
    Location
    Knoxville,Tennessee
    Posts
    2,643

    Default

    Quote Originally Posted by Robyn View Post
    I agree on the small parts, high pressure and erosion..

    At the pressures used in these systems it takes little abrasive to go to work on the metal.

    When you consider the amount of time these parts are subjected to the abuse they take.....no wonder at all that they wear out.

    Old school squirts like the 6.2/6.5 are pretty basic.....add the electronics to the mix and the issues get far more complicated.....A simple pop tester will not operate the Dmax injector.....

    Working in a clean environment is an absolute.....
    Follow factory protocols for the rebuild....No different than anything else we do when building an engine.
    Can it be done at home in the garage.....yup.....I would not hesitate to go at it....just need specs on stuff is all.

    I rebuilt several sets of Squirts for various 6.2/6.5
    Are the ones done by many so called experts any better. ??????? Depends on the tech doing the job....Does he care about quality and is as finicky as we would be.....Big IF right there...

    As far as pricing goes...

    Here is an analogy of WHY THE COST.

    I priced out new track belts for my cat project.
    Go to snow cat supply company....1 belt 8" wide and 287-1/2" long $595 per belt

    Go the the people who make the belting and spec it out $180 per belt for the same part..

    BECAUSE THEY CAN CHARGE UP THE WAZOO.....and they will do so......
    When I was in the fabrication business if I ordered a bearing for an overhead crane wheel or drive it was around $75.00. But if I went to my local bearing house and matched number $8.00. A lot has to do with it fitting by application. Another comp is front wheel bearing for a 66 Chevy Biscayne and a 66 Cadillac. Same part number but different price.
    "The Constitution is not an instrument for the government to restrain the people, it is an instrument for the people to restrain the government."
    -Patrick Henry


    A5150nut
    2006 K3500 D/A
    94 6.5 4x4 5spd Sold

  9. #69
    Join Date
    Apr 2001
    Location
    Newberg Oregon
    Posts
    12,294

    Default

    Yeah buddy.

    When I did the cat differential last summer/fall all the bearings had to be replaced (Water damaged)

    Luckily the numbers were still readable.

    The inner pinion bearing is a big roller bearing. And at $700 and change for the bad boy...../I went shopping.

    Found a new one on ebay.....Located in New York state......$20 including shipping....

    All the bearings came off ebay......all top brand names and exact part numbers..... averaged about $20 each.

    16 big bearings in that sucker.....

    If I had gone to the snow cat parts supplier.....I would have needed to mortgage the ranch...


    Yes....prices are much variable......
    (1) 1995 Suburban 2500 4x4
    (1) 1997 Astro
    (1) 2005 Suburban (Papa Smurf)
    THIS IS BOW TIE COUNTRY

  10. #70
    Join Date
    Feb 2000
    Location
    Montana
    Posts
    11,398

    Post

    Quote Originally Posted by DmaxMaverick View Post
    That's an absolute indication of....something. Likely, at least, a contributor to your pressurized coolant. What's the origin of the engine? I'm sure we discussed it before, but I don't recall.
    Here's what it looked like when I received it from GM... after it was uncrated. The Allison it came with had been used in a test vehicle. The engine looked assembly line new, but I thought it odd that the glow controller hot lead had been clipped off. I received this engine in the spring of 2002. I had assumed this was a new assembly line engine - a 2002 model year, but it was actually a 2001 model year CA emissions engine. The glow controller and glow wiring is the main difference between a CA engine and a 48-state Federal emissions engine.


    It was at this point that I wish I'd clear-coated all of the aluminum components on the engine. So bright and shiny!
    Last edited by More Power; 06-22-2023 at 09:48.

  11. #71
    Join Date
    Apr 2001
    Location
    CA
    Posts
    13,576

    Default

    I've always doweled several bolt holes and slowly lowered the head onto the block. Never gave it more thought past that. Is there something not obvious about the job, other than preventing a mishap that could damage the head? Your method looks very effective, though.
    1985 Blazer 6.2
    2001 GMC 2500HD D/A
    dmaxmaverick@thedieselpage.com

  12. #72
    Join Date
    Feb 2000
    Location
    Montana
    Posts
    11,398

    Default

    Quote Originally Posted by DmaxMaverick View Post
    I've always doweled several bolt holes and slowly lowered the head onto the block. Never gave it more thought past that. Is there something not obvious about the job, other than preventing a mishap that could damage the head? Your method looks very effective, though.
    Not sure exactly what you mean by "doweled several bolt holes".

    I watched a guy on youtube set a Duramax head onto a block (that was on an engine stand) after having already set all of the ARP studs in the block. Maybe he was a clod, but he had to get help after having floated the head over (and making contact with) all 18 studs and still not getting it on. I'd bet that head was scratched all over the deck. Even if done perfectly, I don't think that's possible in-frame with the cab on - certainly not on the driver's side. I know that the rear corner of the driver's side head bolt/stud must be inserted into the head before being lowered into place because of interference with the firewall.

    My main motivation was about not damaging the head decks and gaskets. Cast iron heads are easier to deal with in this regard.

  13. #73
    Join Date
    Apr 2001
    Location
    CA
    Posts
    13,576

    Default

    "Doweled" as in, wooden dowels in the holes. I've used old head bolts with the heads cut off, as well (removed with a vice-grip). If clearance was an issue, short dowels. Wooden dowels got a screw in the end so they can be fished out with a magnet. If I had to use head bolts (never had to), I'd slot the ends so they can be turned with a screwdriver, then fished out with a magnet. I learned this from a retired Ford technician (50+ years) neighbor when I was a teen. He said he had a set for every engine and vehicle he worked on, and never just "tossed" a head on a block. "It's just too easy to do it right the first time." All of my first vehicles were basket cases (dirt cheap or free), so I got a lot of experience. I paid more on DMV fees and insurance than vehicles for many years.
    1985 Blazer 6.2
    2001 GMC 2500HD D/A
    dmaxmaverick@thedieselpage.com

  14. #74
    Join Date
    Feb 2000
    Location
    Montana
    Posts
    11,398

    Default

    I have both heads on, and the first two initial bolt torque settings applied. Next step is to complete the TTY torque angle settings (2 passes at 60 degrees each).
    Last edited by More Power; 09-21-2022 at 10:24.

  15. #75
    Join Date
    Feb 2000
    Location
    Montana
    Posts
    11,398

    Post


    This is how it looked late yesterday. Nearly done! Maybe I'll attempt a restart later today.

    Now I know why some mechanics like ARP studs... They are a lot easier to install. Took me about 2 hours to take all 36 bolts through 2 sequences, what with the setup for each torque angle setting, and wanting to do the best job I could... while in the truck. I watched the TTY head bolts installed at the DMAX plant in Morraine, Ohio back in 2001 - they are all installed at the same time by a machine... Took maybe 30 seconds for each bank. I was thinking of that day while fiddling with the angle card setup for each bolt.

  16. #76
    Join Date
    Oct 2001
    Location
    Granby, Missouri, USA
    Posts
    3,084

    Default

    Quote Originally Posted by More Power View Post
    I watched the TTY head bolts installed at the DMAX plant in Morraine, Ohio back in 2001 - they are all installed at the same time by a machine... Took maybe 30 seconds for each bank. I was thinking of that day while fiddling with the angle card setup for each bolt.
    I remember that! I was there for the plant tour as well, and I thought that was the coolest machine ever.

    Casey
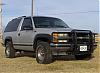
    1995 K1500 Tahoe 2 door, 6.5LTD, 4L80E, NP241, 3.42's, 285/75R16 BFG K02's; 1997 506 block; Kennedy OPS harness, gauges, Quick Heat plugs, and TD-Max chip; Dtech FSD on FSD Cooler; vacuum pump deleted, HX35 turbo, Turbo Master, 3.5" Kennedy exhaust, F code intake; dual t/stats, HO water pump, Champion radiator; Racor fuel filter

  17. #77
    Join Date
    Feb 2000
    Location
    Montana
    Posts
    11,398

    Default

    Completed the 1,254th step (somewhat hyperbolic) in the process late yesterday afternoon. I had spent some time priming the fuel system using the hand pumping plunger on the fuel filter housing while using both the bleeder screw and the fuel test Schrader port. The engine started on the second 15 second cranking cycle. Purrs like a kitten. There were no check engine light or leaks. I was extra careful to make sure every potential leak source was properly installed and tightened before moving on to the next step.

    I shut it off, and spent some time looking everything over, then re-started the engine. Now, there was a service engine soon (SES) lamp. I shut it off, and looked under the hood for anything out of place. I found that the MAF electrical connector had become mostly unplugged. I straightened that out, which must have been due to not getting it latched completely, and the fact that I had to push and pull the air duct to get the new AFE air filter installed - all of which moved the MAF sensor around. However, getting the MAF re-plugged didn't turn off the SES. My Predator programmer won't communicate with this truck... it's married to my 2001 GMC, so I don't have a code to report. Does anyone know if a MAF code has to be cleared or does it go out on its own? Of course, I don't know for sure that the SES is due to a MAF code...

    However, the truck runs great! I drove it about 15 miles to warm it up and to burp the cooling system. Makes so much power! It purrs... And, no excessive pressure in the cooling system. Yay!
    Last edited by More Power; 09-16-2021 at 10:35.

  18. #78
    Join Date
    Apr 2001
    Location
    CA
    Posts
    13,576

    Default

    Your Predator should at least be able to read and clear codes on any LB7, even if married to another VIN. It won't allow any programming, but should read codes fine. I have an early model married to my 2001, and it will read all LB7 and some 04-05 LLY trucks (2006 LLY was a transition), as well as a bunch of other non- CanBus brands and models I've tried. If it doesn't read, check that the OBD port has 12V power, which is required. If it doesn't have power, the tool will seem to power up, but won't do anything (communication error), like plugging it in with the key off, on a truck that's known to work.

    The MAF codes are immediate, meaning the PCM only acts if the code condition is presently active. Otherwise, it will remain in history for several start and warming cycles, with the SES lamp on. After the SES turns off, it will remain in history for 40 cycles, IIRC. If you have an active MAF code, you should notice the engine running different. It resorts to a default fueling map, which is very conservative. Unplug the MAF and give it a test. If you don't notice a difference, then it's still faulting that series of codes.
    1985 Blazer 6.2
    2001 GMC 2500HD D/A
    dmaxmaverick@thedieselpage.com

  19. #79
    Join Date
    Feb 2000
    Location
    Montana
    Posts
    11,398

    Default

    The Predator powers up, and says" Establishing Communications..." or some such, but stays there for as long as I have patience for (with the key in the "RUN" position).

    There is unswitched 12v power on pin 16 and a solid ground on pin 4.

    https://pinoutguide.com/CarElectroni...i_pinout.shtml

    By the way, this lack of communications was present before the tear-down. I wanted to record the injector fuel rates before beginning, but couldn't. And, this truck is running a Kennedy ECM, if that makes any difference...

    Update Friday morning: I started the truck last evening, and saw that the SES lamp was gone. Apparently, the prescribed number of ign/start/warmup/cycles allowed the SES to go out. Still a puzzle why Lil Red's test port doesn't allow connection to the ECM. The wiring harnesses were all new factory items when the truck was first put together...
    Last edited by More Power; 07-30-2021 at 08:19.

  20. #80
    Join Date
    Apr 2001
    Location
    CA
    Posts
    13,576

    Default

    I suspect the ECM plays at least a part in it. I've used 3 Predator tools on several trucks, and some of them had Hypertech programming or plug-in modules in them, and it was able to read/clear codes, as well as read real-time data. I mention the 12V power at the connector because some of them had the power missing at key-off, but worked once keyed on. There were probably other issues at play that I don't recall, but it's happened more than once. It may have been due to a power module or some harness hacking. If yours powers the tool before keying on, it isn't the issue. You possibly could have used the PCM from the 2001 in Lil Red to read the engine data. It may still have some use for benchmark data, and for a comparison between the two, if it works. I don't know if it will, and I've never tried it.
    1985 Blazer 6.2
    2001 GMC 2500HD D/A
    dmaxmaverick@thedieselpage.com

Similar Threads

  1. Head Gasket Replacement - Need Direction
    By schaack2 in forum 6.5L Turbo Diesel - Tech Support - Troubleshooting - Performance
    Replies: 13
    Last Post: 05-11-2011, 19:08
  2. Head gasket replacement
    By jhornsby3 in forum 6.5L Turbo Diesel - Tech Support - Troubleshooting - Performance
    Replies: 6
    Last Post: 08-23-2010, 10:10
  3. head gasket replacement
    By boogie95 in forum 6.5L Turbo Diesel - Tech Support - Troubleshooting - Performance
    Replies: 2
    Last Post: 02-18-2005, 14:59
  4. Head gasket replacement questions
    By mdregister in forum 6.2L Diesel - Tech Support - Troubleshooting - Performance
    Replies: 6
    Last Post: 01-30-2005, 15:22
  5. 94 Head Gasket Replacement
    By PerryMo in forum 6.5L Turbo Diesel - Tech Support - Troubleshooting - Performance
    Replies: 3
    Last Post: 02-15-2004, 12:25

Tags for this Thread

Posting Permissions

  • You may not post new threads
  • You may not post replies
  • You may not post attachments
  • You may not edit your posts
  •